Product videos do not always require a new shoot. In many cases, a business already has enough material to create useful marketing content: product demonstrations, customer footage, unboxing clips, lifestyle shots, screen recordings, event footage, or older campaign assets.
The challenge is turning that collection of clips into a focused video with a clear message. Existing footage often contains repeated takes, long pauses, unrelated scenes, different framing, and clips recorded for different purposes. The real work is deciding what belongs in the final edit and how those pieces should be arranged.
This guide explains how to turn existing footage into product videos, from reviewing your media library to building the first cut, adding product information, and preparing versions for different channels.
Table of Contents
Before opening your editing software, decide what the video needs to communicate. A product video can have several goals, including:
Pick one primary purpose for each video. A collection of unrelated selling points usually makes an edit harder to follow.
For example, suppose you have footage of a coffee machine. Instead of trying to cover every feature, you might create a 45-second video around one idea: how quickly someone can make their morning coffee.
That gives the editor a simple structure: introduce the situation, show the product, demonstrate the process, and finish with the result.
The next step is to understand what you already have.
Separate your footage into useful categories such as:
You do not need to use every clip. In fact, trying to include everything is one of the easiest ways to make a product video feel crowded.
Look for footage that shows the product clearly and footage that helps establish context. A close-up of a product button may be useful for explaining a feature, while a wider shot can show how the product fits into a real situation.
Once the footage is organized, create a basic sequence. A simple product video structure might look like this:
Start with the problem, result, or product moment that gives viewers a reason to keep watching.
Show what the product is and establish the context quickly.
Use existing footage to show the product solving a problem or performing a specific task.
Explain what the viewer should take away from the demonstration.
End with the next step, whether that is learning more, visiting a product page, signing up, or simply remembering the product.
This structure does not have to be followed rigidly. A product demonstration may work better when it starts immediately with the action. The important thing is that every clip has a role.
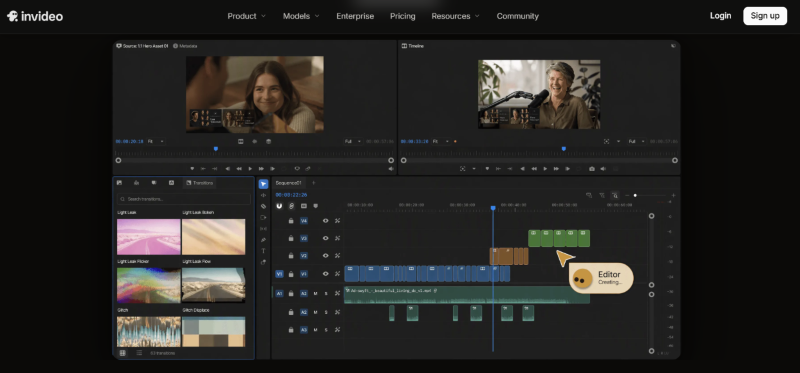
The most time-consuming part of editing existing footage is often not adding effects. It is reviewing material and deciding what should make the first cut.
This is where an AI-assisted editing workflow can be useful. Invideo editor combines a professional editing timeline with AI editing agents, giving you a way to edit videos online while keeping control over the project. You can provide footage and direction, then have an agent work through tasks such as reviewing material, selecting usable takes, removing repetition, and assembling an editable base cut.
That distinction matters. The goal is not to have AI decide what your final product video should be without supervision. The first assembly gives you a usable starting point that you can inspect and refine.
For a product video, you could direct the assembly around a particular feature or demonstration rather than simply asking for a collection of the best-looking shots. The result can then be treated like an assistant editor’s first pass. You review the sequence, change selections, adjust pacing, and make the creative decisions yourself.
A product video can contain technically good footage that still does not belong in the final cut. When reviewing clips, ask:
If two clips communicate the same thing, choose the stronger one. Pay attention to continuity as well. If a product is being demonstrated, changes in hand position, product state, camera angle, or background can make the edit feel disconnected.
This is particularly important when combining footage captured at different times. Existing footage rarely has perfect visual consistency, so careful clip selection can reduce the amount of correction needed later.
Text overlays can make existing footage more useful, particularly when the original clips were not recorded specifically for marketing.
You can use on-screen text to identify:
Keep each message short enough to understand while watching the footage. For example, rather than placing a paragraph about a product’s battery technology over a demonstration, highlight one relevant point such as “Up to 20 hours of use” if that claim is accurate and approved for your campaign.
The footage should remain the primary visual information. Text should clarify it, not compete with it.
Existing footage often comes from multiple shoots, devices, or creators. This can result in inconsistent audio levels, background noise, colour, and exposure.
Start with dialogue and other important audio. Remove distracting noise where possible, balance volume between clips, and make sure music does not overpower spoken information.
Then look at the visual consistency of the sequence. Basic colour correction can help footage from different sources sit together more naturally. You may need to adjust exposure, white balance, contrast, or colour before applying a broader visual treatment.
You do not need an elaborate grade for every product video. The priority is making the footage feel coherent and keeping the product easy to see.
One of the biggest advantages of starting with existing footage is that a single collection of assets can support several pieces of content.
For example, a longer product demonstration could become:
The key is not simply trimming the same video to different lengths. Each version should have a purpose.
A social cut may need to introduce the product immediately. A product-page video can spend more time demonstrating how it works. A tutorial may need clearer sequencing and explanatory text. Keeping the edits connected to the same source project can also make revisions easier when product information or campaign messaging changes.
Before publishing, watch the video without thinking about how difficult it was to make. Ask whether someone unfamiliar with the product can understand:
Also watch for unnecessary pauses, repeated information, confusing transitions, weak opening shots, and moments where the product disappears from view for too long. A technically polished video can still fail if the viewer has to work too hard to understand the point.
The complete process can be kept relatively simple:
Existing footage → Organize → Define the product story → First assembly → Review → Refine → Add product information → Correct audio and colour → Create versions → Final review
AI editing can help most during the repetitive parts of this process, particularly footage review, take selection, assembly, and searching for specific moments. Creative judgment still matters when deciding what the product should communicate and how the final video should feel.
Tools such as invideo editor can be useful when you want AI assistance directly inside an editable timeline rather than generating a finished video separately from your footage. That makes it easier to treat the AI output as an initial edit and continue working manually from there.
Creating a product video from existing footage is less about having a perfect collection of clips and more about knowing how to shape what you already have.
Start with one clear product message, organize the footage around that goal, and build a rough sequence before spending time on polish. Remove repetition, choose clips that contribute to the story, and use text, sound, colour, and pacing to make the message easier to follow.
AI editing tools can reduce the repetitive work involved in reviewing footage and building an initial cut, but the strongest results still come from human direction and revision.
The best existing-footage workflow is therefore not about using every clip. It is about finding the useful material, giving it a clear purpose, and turning it into a product story that works for the person watching.
Also read this related article “7 Best AI Video Editor Recommendations for Product Videos”